Creating a Documentation Site
This guide walks you through setting up your first documentation site on Docsbook — no coding experience required. Each step includes screenshots so you always know exactly where to click.
What You'll Need#
Before starting, make sure you have:
- A computer with internet access — any OS works (Windows, Mac, Linux)
- A free GitHub account — this is where your documentation files will live
If you don't have a GitHub account yet, go to github.com and click Sign up — it's free and takes about two minutes.
What is GitHub? GitHub is a popular website where people store and share files — especially for documentation and software projects. Think of it like Google Drive, but specifically designed for text files and code. Docsbook reads your files from GitHub and turns them into a beautiful documentation website.
Step 1 — Create a GitHub Account (skip if you already have one)#
- Go to github.com
- Click Sign up in the top-right corner
- Enter your email address and choose a password
- Choose a username — this will appear in your docs URL (e.g.
docsbook.io/your-username/your-repo) - Verify your email address
Step 2 — Create a Repository for Your Documentation#
What is a repository? A repository (or "repo") is like a folder on GitHub. It stores all your documentation files. You'll need one repository per documentation site.
Option A — Start with an Example (Recommended for beginners)#
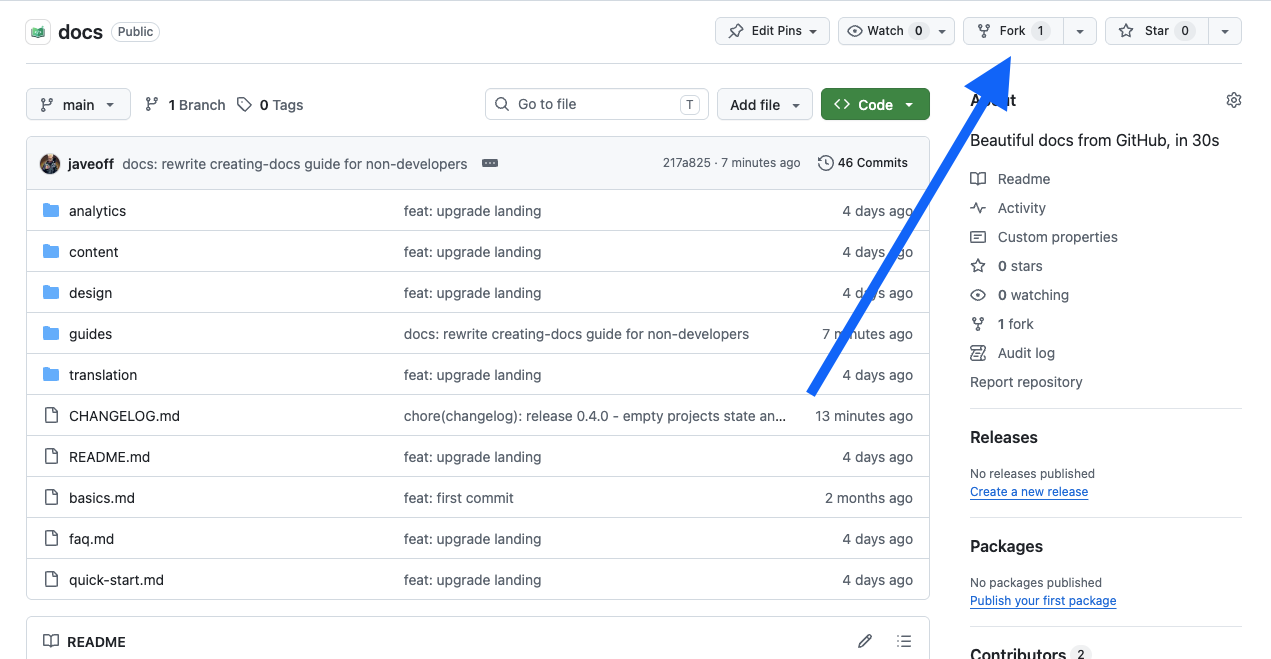
The easiest way to get started is to copy one of our ready-made example repositories. This is called forking — it creates your own personal copy of the repository that you can freely edit.
-
You'll see a page with files and a description
-
Click the Fork button in the top-right corner of the page
What does Fork mean? "Forking" means making your own personal copy of someone else's repository. It's like pressing "Duplicate" on a Google Doc. Your copy is completely independent — changes you make won't affect the original.
-
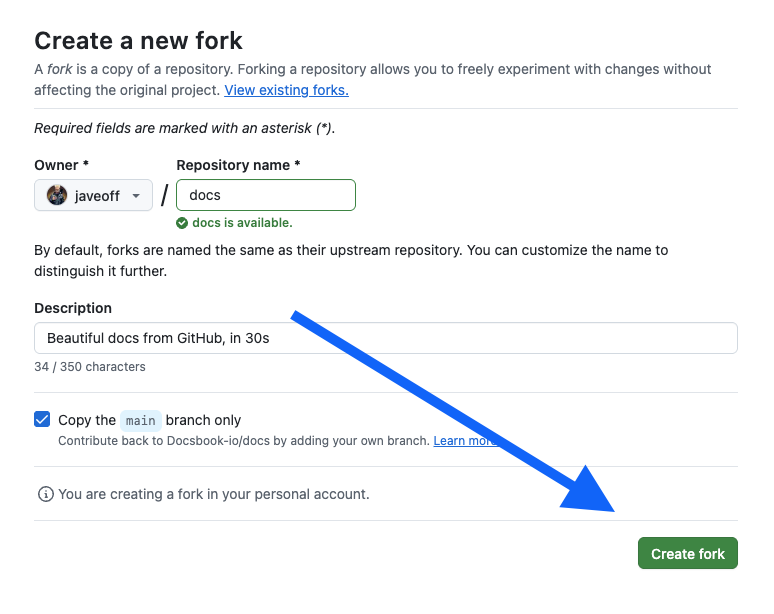
A dialog appears. Leave all settings as they are and click Create fork
-
After a moment, GitHub takes you to your new repository at
github.com/YOUR-USERNAME/docs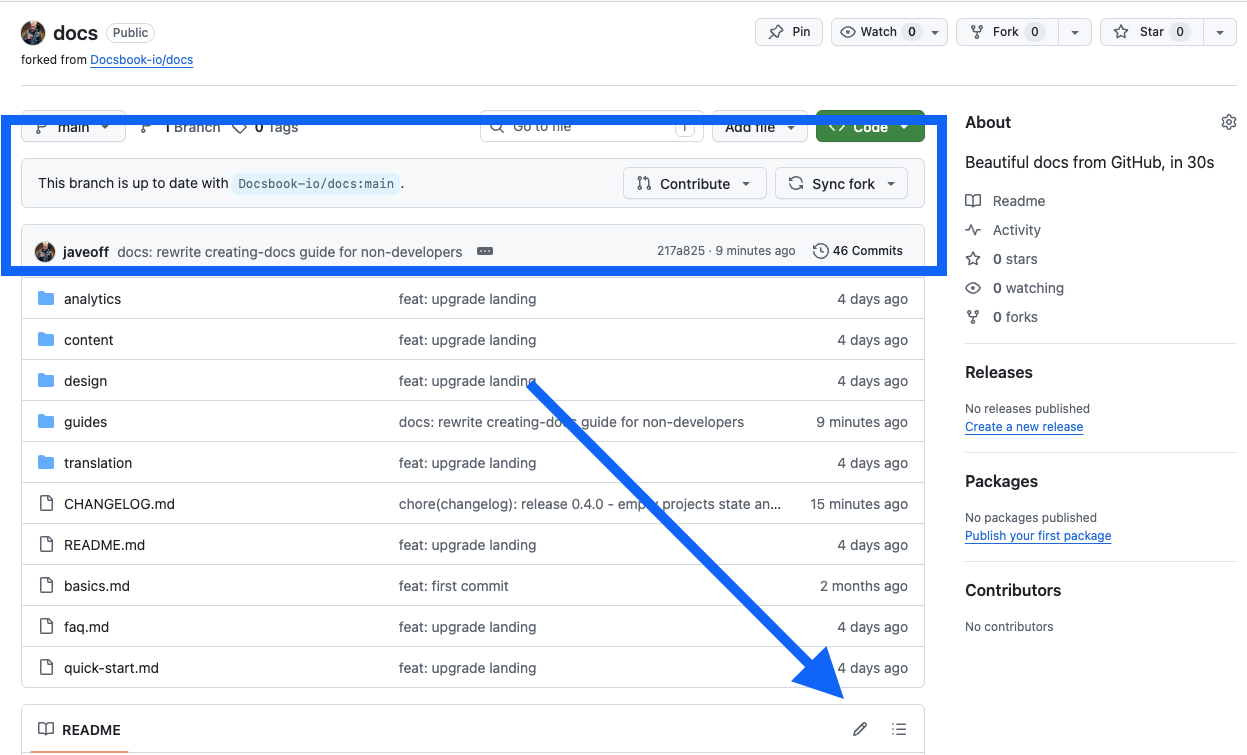
Done! You now have a repository with example documentation files ready to edit.
Option B — Start from Scratch#
If you prefer to begin with a blank slate:
-
Make sure you're signed in to GitHub
-
Go to github.com/new

-
Fill in the form:
- Repository name — choose a short name with no spaces, e.g.
my-docsorproduct-docs - Description — optional, a brief description of what this is
- Visibility — select Public (Docsbook requires public repositories)
- Check Add a README file — this creates your homepage
- Repository name — choose a short name with no spaces, e.g.
-
Click Create repository
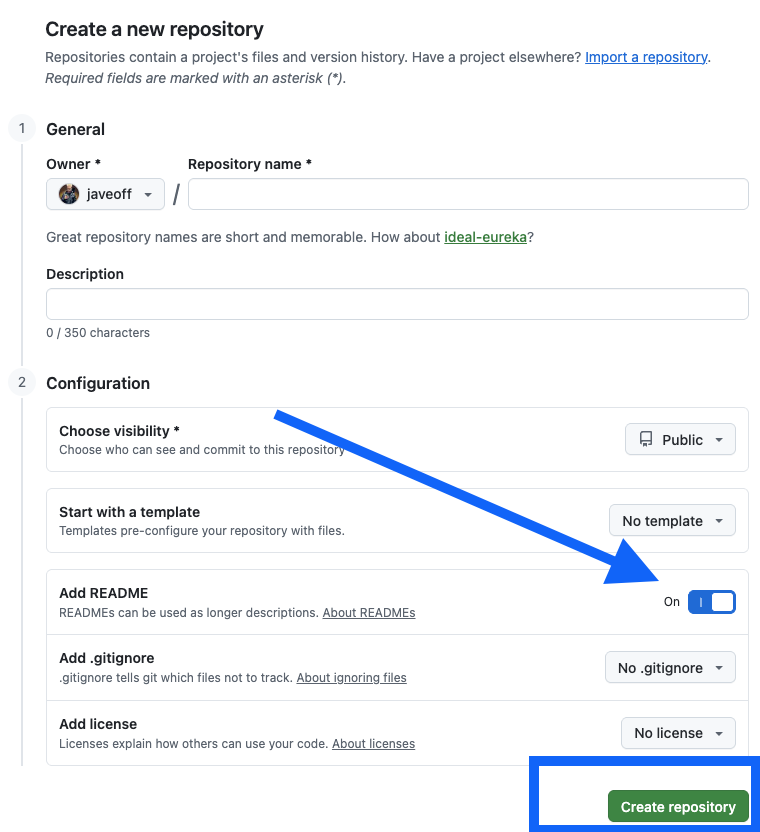
-
Your new repository opens. It contains one file:
README.md
Step 3 — Connect Your Repository to Docsbook#
Now that you have a GitHub repository, let's connect it to Docsbook to create your documentation site.
-
Go to docsbook.io/connect

-
Click Sign in with GitHub
-
GitHub asks you to authorize Docsbook. Click Authorize docsbook
Docsbook only reads your repository files — it cannot modify or delete anything.
-
You'll see a list of your repositories. Find the one you just created and click on it
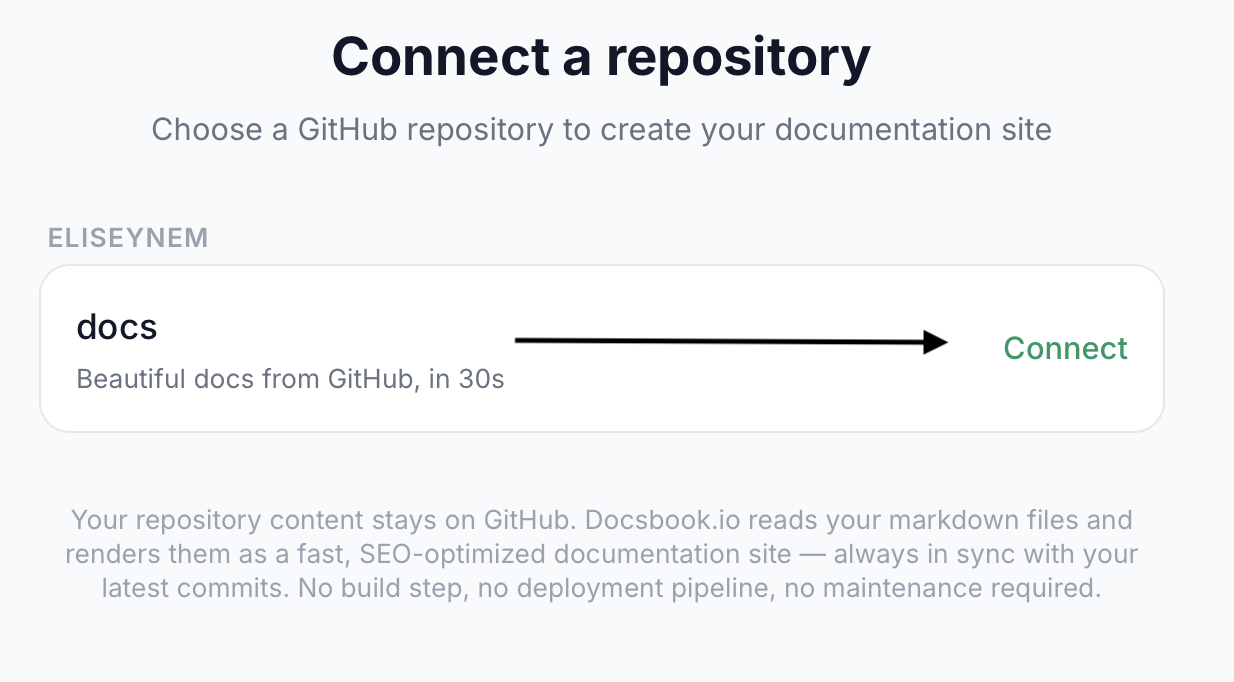
-
Docsbook creates your documentation site. You'll be redirected to it automatically.
Your documentation site is now live at:
docsbook.io/YOUR-GITHUB-USERNAME/YOUR-REPO-NAME
Step 4 — Edit Your Documentation#
There are three ways to edit your documentation files. Choose the one that feels most comfortable.
Option A — Edit Directly on GitHub (Easiest, no setup needed)#
This is the simplest method. You edit files right in your browser on GitHub — no software to install.
Edit an existing page#
-
Go to your repository on GitHub (e.g.
github.com/YOUR-USERNAME/docs) -
Click on the file you want to edit, for example
README.md
-
Click the pencil icon (✏️) near the top-right of the file content
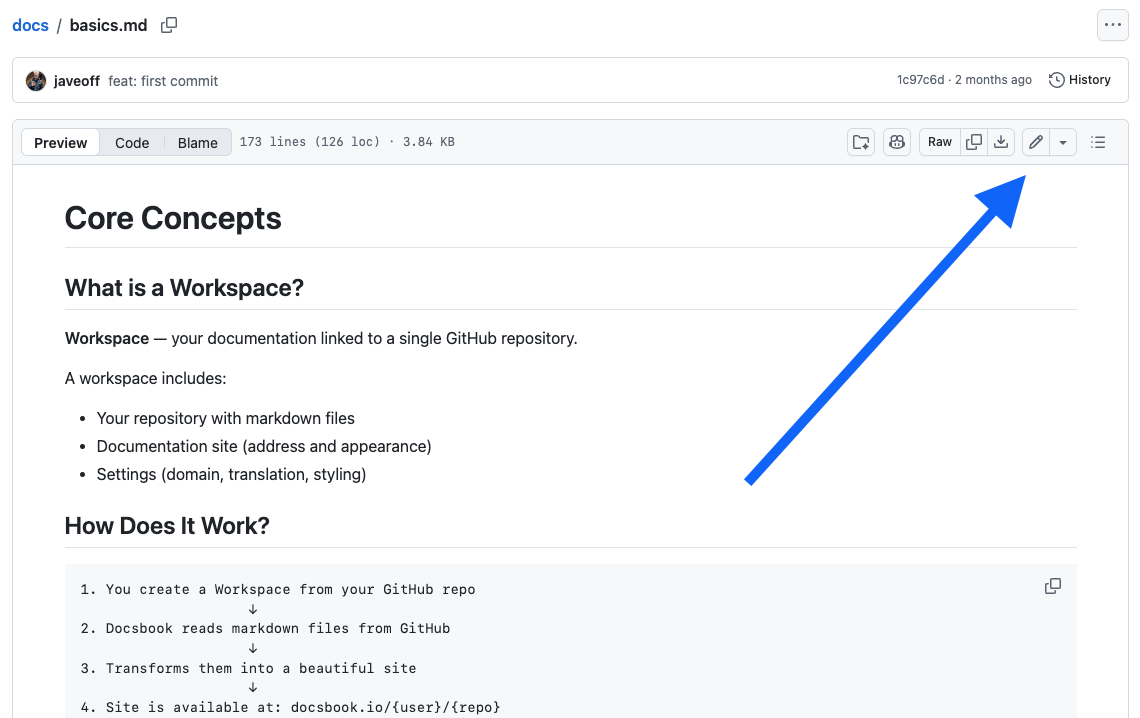
-
The file opens in an editor. Make your changes.
Your documentation uses Markdown — a simple way to format text. For example:
**bold**becomes bold,# Headingbecomes a large heading. See the Markdown guide below for more.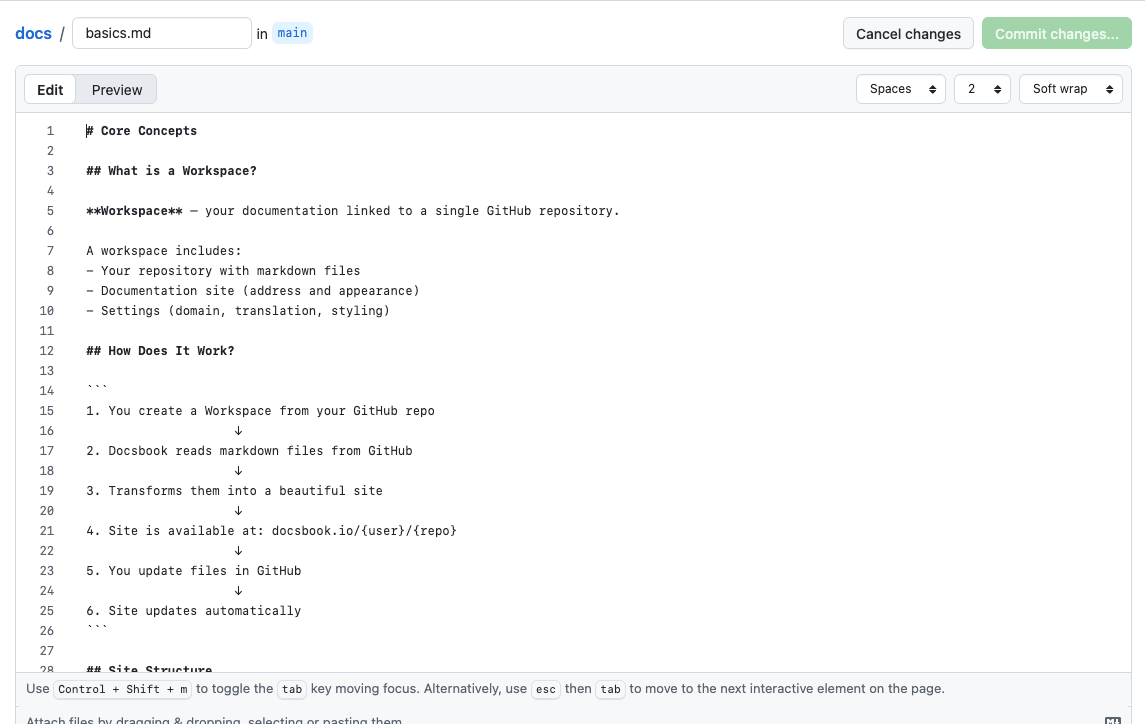
4.1 Learn how to edit Markdown files with pretty customization
-
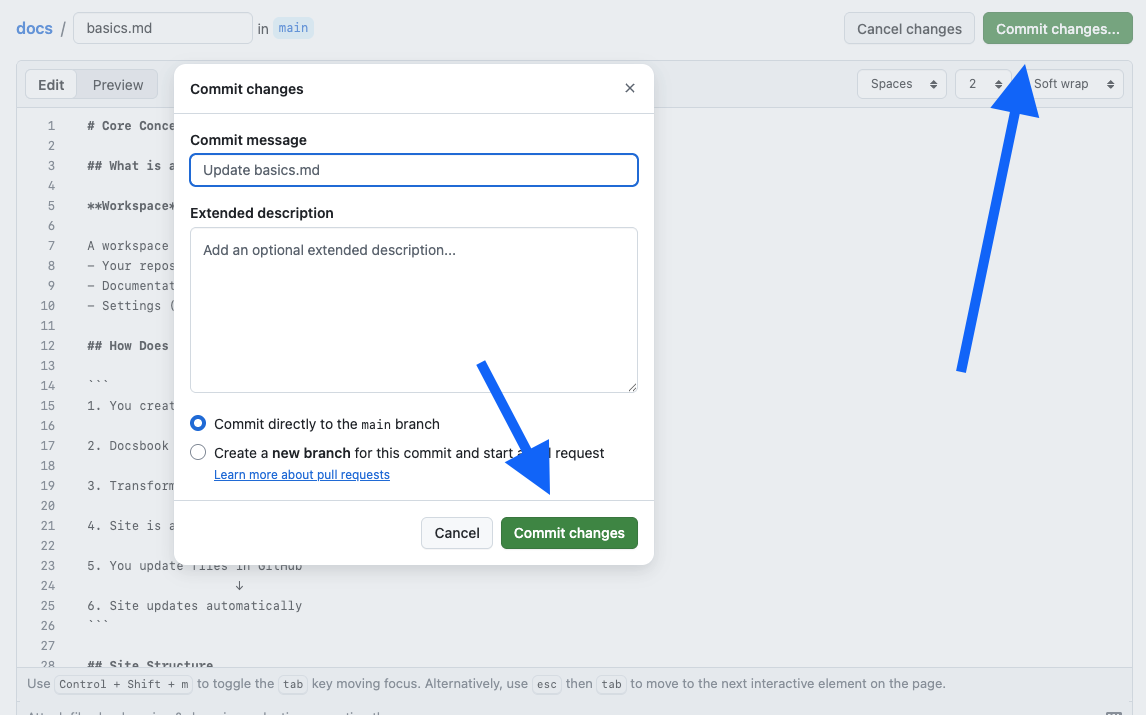
When you're done editing, scroll down to the Commit changes section
-
Optionally, write a short note describing what you changed (e.g. "Update introduction")
-
Click Commit changes
-
Go back to your Docsbook site and refresh — your changes appear immediately.
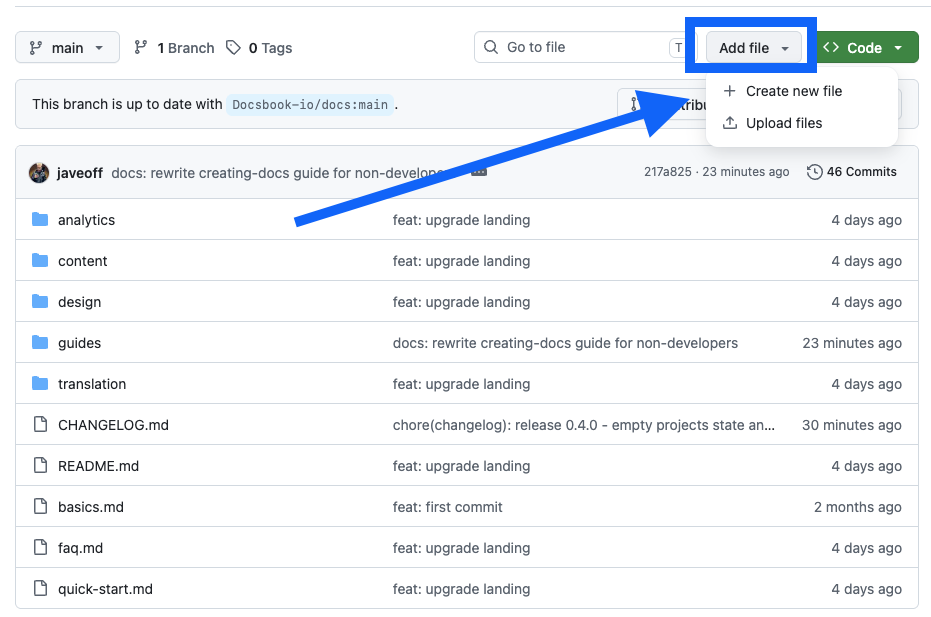
Add a new page#
-
Go to your repository on GitHub
-
Click Add file → Create new file
-
In the Name your file field, type the path and filename. For example:
guides/installation.mdTyping a
/in the name automatically creates a folder. For example,guides/installation.mdcreates aguidesfolder withinstallation.mdinside.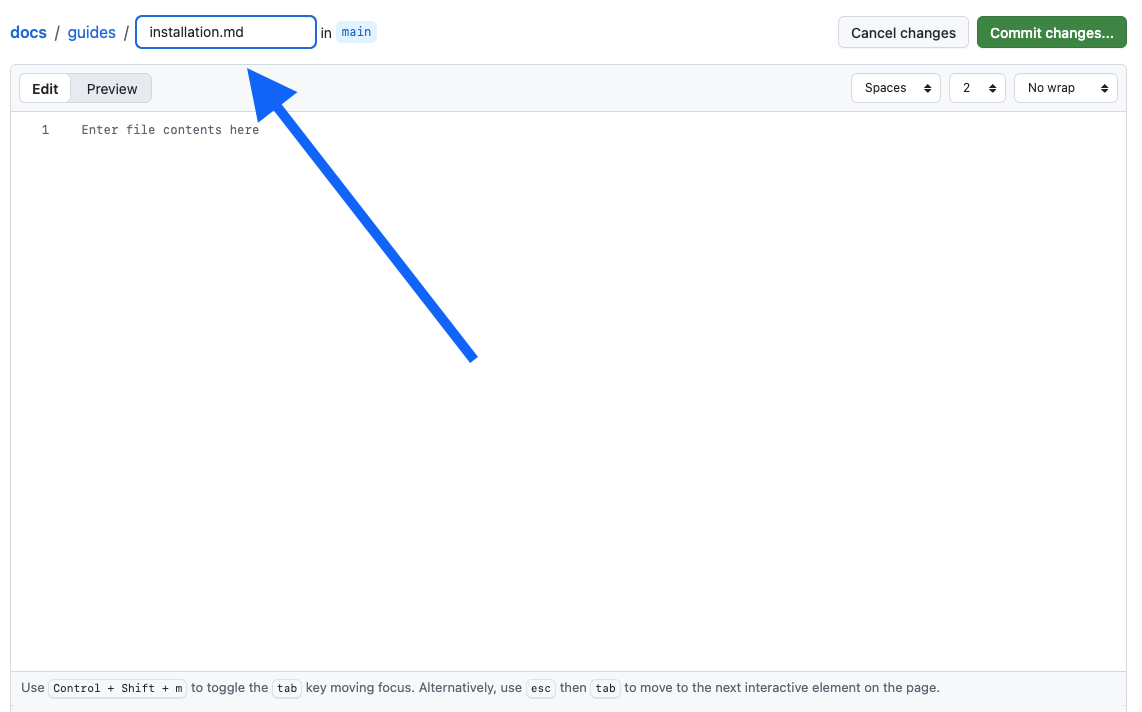
-
Write your content in the editor below
-
Click Commit new file
The new page appears in your Docsbook sidebar automatically.
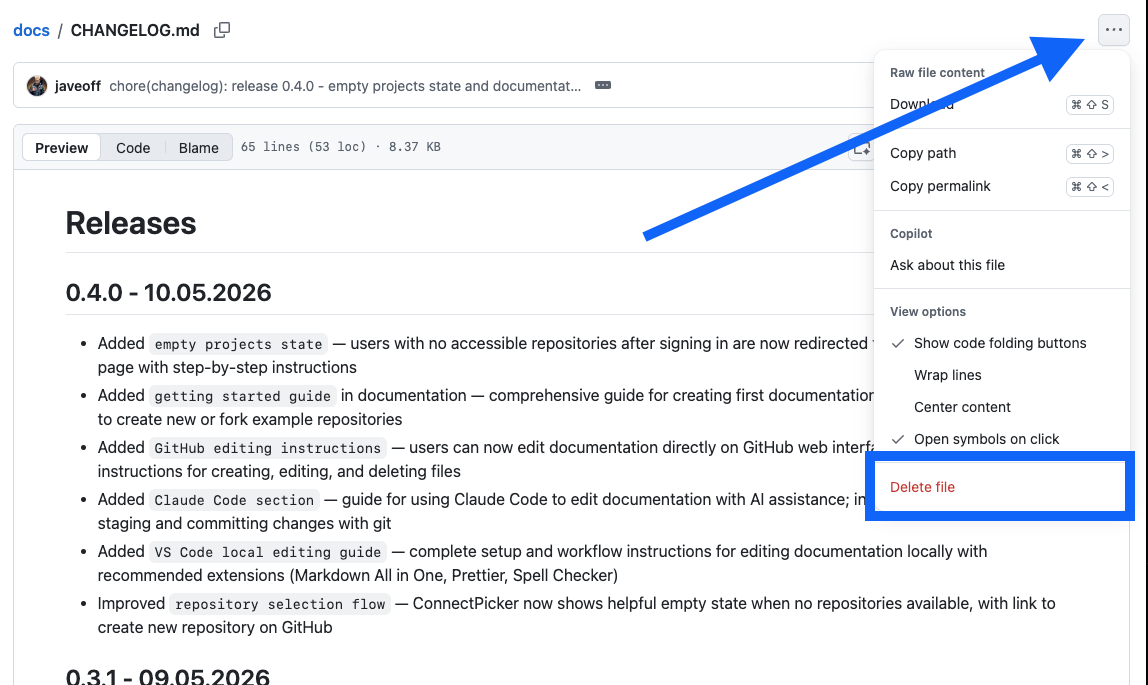
Delete a page#
-
Open the file in your repository
-
Click the ⋯ (three dots) menu icon near the top-right
-
Click Delete file
-
Click Commit changes to confirm
Option B — Edit with Claude Code (AI-assisted, no terminal needed)#
Claude Code is an AI coding assistant that can read, create, and edit your documentation files through conversation — no terminal commands or Git knowledge required. Great if you want to produce a lot of content quickly.
Setup (one time)#
-
Go to claude.ai/code and download Claude Code
-
Install it following the on-screen instructions
-
Open Claude Code and say:
"Clone my GitHub repository github.com/YOUR-USERNAME/YOUR-REPO-NAME to my computer and open it"
Claude handles the rest — no terminal needed.
Creating and editing documentation#
Just describe what you want in the chat panel:
Create a new page
"Create a new file called
guides/installation.mdwith a getting started guide. Include sections for system requirements, installation steps, and first login."
Edit an existing page
"Open
guides/quick-start.mdand add a Troubleshooting section at the end with 5 common problems and solutions."
Rewrite or improve
"Read
guides/quick-start.mdand make it shorter and simpler — aim for someone with no technical background."
Create multiple pages at once
"Create the following pages:
guides/faq.mdwith 10 billing questions, andapi/overview.mdwith a REST API overview."
Claude writes the content and saves the files. Review the result and ask for adjustments if needed.

Save and publish your changes#
When you're done, just tell Claude:
"Commit all changes and push to GitHub."
Claude runs the necessary commands for you. Your Docsbook site updates within seconds.
Connect your docs#
After, you should connect repository, go to docsbook.io/connect — this page lets you sign in with GitHub and select a repository at any time.
Markdown Basics#
Docsbook uses Markdown — a simple set of symbols that control how text is formatted. Here's everything you need to know:
Text formatting#
| What you type | What it looks like |
|---|---|
**bold text** |
bold text |
*italic text* |
italic text |
~~strikethrough~~ |
|
`inline code` |
inline code |
Headings#
# Large heading (page title)
## Medium heading (section)
### Small heading (sub-section)Lists#
- First item
- Second item
  - Nested item (indent with 2 spaces)

1. First step
2. Second step
3. Third stepLinks#
[Click here](https://example.com)
[Link to another page in your docs](/docs/guides/getting-started/other-page)Images#
Code blocks#
Use triple backticks to show code with syntax highlighting:
```javascript
console.log("Hello!")
```
Callout / Quote#
> This is a note or important callout.Your Docs Site Structure#
Docsbook builds the sidebar navigation automatically from your file and folder structure. There's nothing to configure.
| Files in your repository | Sidebar in Docsbook |
|---|---|
README.md |
Home |
installation.md |
Installation |
guides/quick-start.md |
Guides → Quick Start |
api/overview.md |
Api → Overview |
Tips:
- File and folder names become the page titles (hyphens are replaced with spaces)
README.mdinside a folder becomes the index page for that folder- Lowercase names with hyphens work best for URLs:
getting-started.md→/getting-started